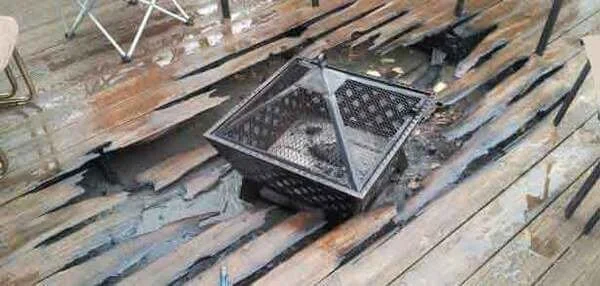
A cosy fire pit can transform your wood deck into a welcoming outdoor haven, perfect for cool evenings and summer gatherings with friends and family. However, building a fire pit on a wood deck requires careful planning and adherence to safety guidelines to prevent accidents and damage.
That’s why we’re sharing with you today a comprehensive guide to help you build a fire pit on your wood deck safely and effectively.
Step 1: Check Local Fire Regulations
Before you start any construction, it’s crucial to check your local fire regulations and building codes. Some areas may have restrictions or specific requirements for fire pits on wooden decks. Contact your local fire department or municipal office to ensure you’re in compliance with all applicable laws and regulations.
Step 2: Choose the Right Fire Pit
When selecting a fire pit for your wood deck, opt for a model that is specifically designed for use on wooden surfaces. Look for fire pits with built-in safety features such as spark guards and heat shields. Portable gas fire pits are a great option because they produce less heat and fewer embers compared to wood-burning fire pits. We know….they are way less fun, but safety first!
Step 3: Use a Fire-Resistant Mat or Pad
To protect your deck from heat damage and potential fire hazards, place a fire-resistant mat or pad beneath the fire pit. These mats are designed to withstand high temperatures and will act as a barrier between the fire pit and the wooden surface. Make sure the mat is large enough to catch any stray sparks or embers so you avoid this!
Step 4: Ensure Proper Ventilation
Proper ventilation is essential when using a fire pit on a wood deck. Ensure there is ample space around the fire pit for air to circulate. This helps to disperse heat and smoke, reducing the risk of fire. Avoid placing the fire pit in an enclosed area or under a low-hanging roof or canopy.
Step 5: Maintain a Safe Distance from Flammable Materials
Position the fire pit at a safe distance from any flammable materials such as furniture, plants, and railings. A good rule of thumb is to keep at least a 10-foot radius of clear space around the fire pit. This precaution helps prevent accidental fires and allows for a safe and enjoyable experience.
Step 6: Assemble the Fire Pit
Follow the manufacturer’s instructions to assemble the fire pit. Ensure all components are securely fastened and stable. If you’re using a gas fire pit, check all connections for leaks before igniting. For wood-burning fire pits, use seasoned hardwood to reduce smoke and sparks.
Step 7: Practice Safe Fire Management
Always have a fire extinguisher, a bucket of water, or a garden hose nearby when using the fire pit. Never leave the fire unattended and keep children and pets at a safe distance. Use a spark guard to contain embers and prevent them from scattering onto the deck.
Step 8: Extinguish the Fire Properly
Once you’re done enjoying the fire, extinguish it completely. For gas fire pits, turn off the gas supply and disconnect the fuel source. For wood-burning fire pits, spread out the remaining wood and embers, and pour water over them until the fire is fully extinguished. Stir the ashes to ensure all embers are out.
Step 9: Regular Maintenance
Regularly inspect your fire pit and deck for any signs of wear or damage. Replace any worn-out parts of the fire pit and reseal the deck as needed to maintain its protective finish. Keeping both the fire pit and deck in good condition will help ensure long-term safety and enjoyment.
Conclusion
Building a fire pit on a wood deck can be a delightful addition to your outdoor living space. By following these steps and adhering to safety guidelines, you can create a cosy and secure environment for making memories around the fire. Always prioritise safety and enjoy the warmth and ambiance that a well-constructed fire pit brings to your home.
Happy building and enjoy your new fire pit!


