The upcoming festive season is something we’ve been waiting for….well, for a year! And don’t give us the “I’m not a kid, Christmas is for them” answer. You know, that your inner kid is screaming to scroll Christmas markets and treat yourself inside out. But times are tough, we know that too.
At Kaltimber, we love wood, and we loooove Christmas! So check out these easy and cheap DIY projects to decorate your home, offer to relatives, or simply to make yourself happy!
Woodworking is an extremely rewarding hobby. Unlike sewing, where you feel like the benefits are overshadowed by its sweat equity, the amount of overhead you can save by building your own pieces is astounding.
Candle Holder Centrepiece
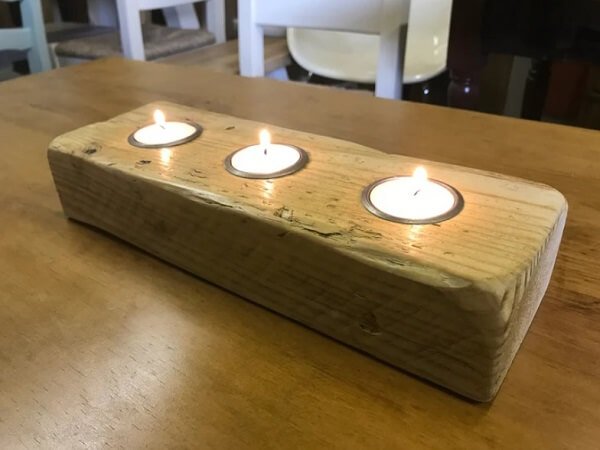
Nothing says “christmas” better than lit candles (well, aside from Santa himself of course). It’s really easy to find a piece of wood to drill in. It doesn’t have to be such a beautiful block like in the example below. Actually, anything “raw” will give a great look, maybe even better!
Drill a hole the depth of your tea light using a 1.5" spade bit, sand the edges, and then cover with a coat of gloss.
In all honesty, this was the simplest woodworking task you would ever finish, but look how lovely it looks!
Santa & Tree blocks
Without a doubt, the hardest part of this project is cutting down 2x4s along the grain at an angle.
But if you don't have access to a circular saw, or if you’re just scared of using one (we won’t blame you!), you can settle for easy-to-work-with plywood. All you will have to do then will be to find a way for them to stand. Unless you just want to drill a hole and place them on your wall!
The decoration will be so easy, you will have fun with your kids. Or alone! Remember, don’t shoo away your inner kid!
Stop Here Santa!
As usual, the hardest part is to cut the wood part, but again, use some cheap and thin plywood and you will have the easiest time to cut them the shape you want!
The most important thing is not to forget to write “Please Stop Here Santa” because you don’t want anyone to stop!
Paint the signs red. Use exterior paint if your sign will be exposed to the elements.
Paint the entire pole with white paint. You can use semi-gloss for all parts of the santa sign.
Use a blow dryer to speed up the drying process.
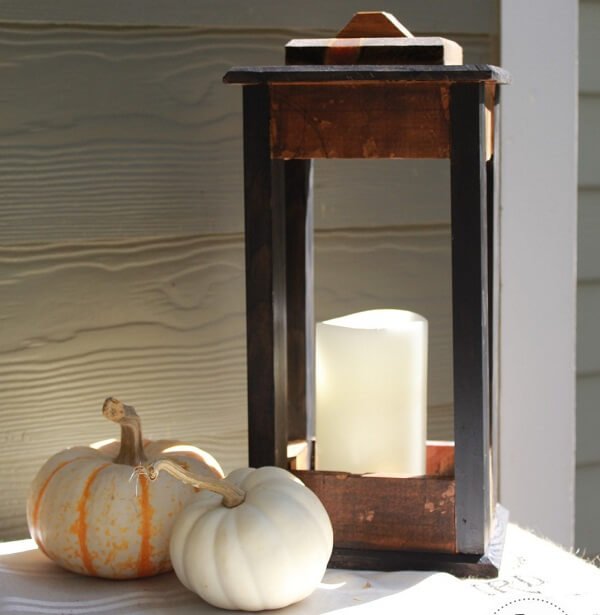
Wood Lantern
One of these is simple to build with scraps from your garage. Or use fruit/mil/wine crates! Have the youngsters help you by painting your lantern. Drill a hole through the top of the lantern and attach a wire hook for a little extra fanciness.
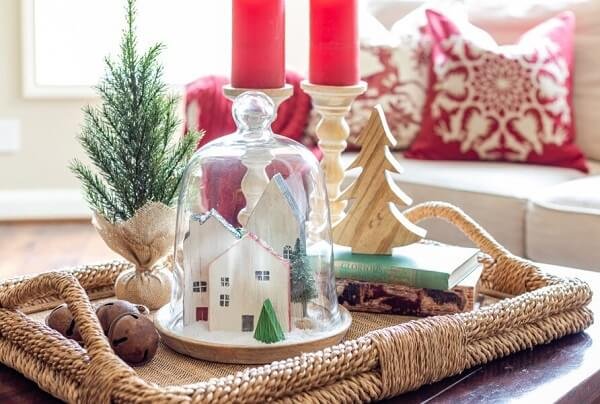
Little Christmas Village
The ideal winter wonderland scene for your holiday table is created by little wooden cottages covered in a glass cloche.
It's up to you whether you want to paint, stain, or otherwise embellish your wooden buildings. They can be displayed with or without a cloche. In the end, you can just opt to paint plain black, white, and red houses while also including windows and doors.
Step 1: Trace patterns onto scrap wood
Step 2: Cut wood using a scroll saw or band saw
Step 3: Sand and paint or stain the houses
Step 4: Sand the painted houses
Step 5: Display your mini wooden houses
Rustic DIY Christmas Card Display
Alright, Christmas cards aren’t exactly the most popular since we started to live in a digitalized world, but don’t you miss them? Or wouldn’t you like to print and display the ones you receive by email? In any case, such a card display would definitely give your relatives ideas to offer them because they would know how much they would be valued.
These ideas should get you going, but don’t forget those we gave you last year!


