Problems: Cupping and Crowning

cupping and crowning

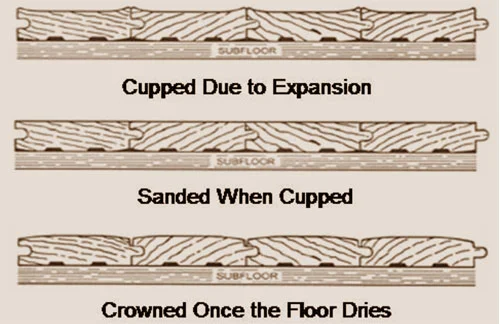
Cupping and crowning are two terms used in the hardwood flooring industry to describe the reaction wood floors experience when there are problems with moisture levels in the home. It should be noted that very slight cupping or crowning can take place within normal humidity changes such as with those of the changing seasons and periodically should be expected. Solid wood flooring tends to be more susceptible to these problems as the wood planks are made of solid wood the entire way through, whereas engineered wood experiences less issues because only the top layers of the wood are made from the wood species in question. Both cupping and crowning can be experienced regardless of the wood species or width of the planks.

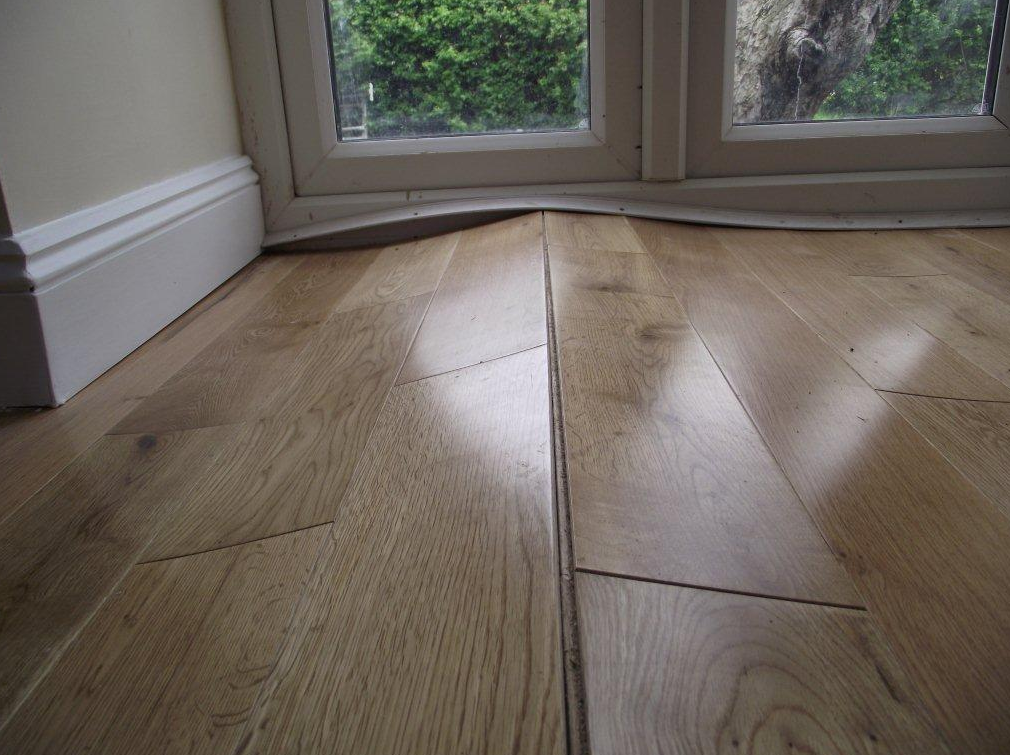
Cupping: Cupping happens when both side edges of the plank seem to rise up out of the floor and cause a “dip” to appear in the middle of the plank. It looks like a cup, a misshaped “U”. Cupping can be slight or very noticeable. When excess moisture is absorbed into the plank it causes the edges of the plank to expand with such force that they crowd the planks on either side of it, forcing the edges of the wood to rise up causing the dip in the middle. Usually this is because moisture remains underneath the planks.

Crowning:  Crowning takes place when the edges of the wood shrink in towards the bottom while the middle or the top of the plank swells up past the rest of the regular level of the floor. It looks like a small roll sticking out above the rest of the flooring. This can either also be barely or very noticeable based on the situation. This happens when moisture is left sitting on top of the plank rather than the edges.

Probable Causes:

    • Outside of normal changes in the humidity levels during seasonal changes, moisture can remain underneath the floor or on top of the planks without the homeowner necessarily being aware that it’s happening.
    • A big spill could have taken place on the floor that was left unattended or not cleaned up after in a proper manner.
    • Moisture could be leaking up through subflooring.
    • A leaky pipe in the walls could be dripping down onto support beams that in turn lead to subflooring materials.
    • Dryer vents can become clogged and then different moisture levels unknowingly get pumped back into the house. (It’s common for homeowners to be unaware this has been happening especially if the homeowner often turns the dryer on but then leaves the home and comes back several hours later.)
    • Condensation near the bottom of uninsulated patio doors may accumulate near the edges of the floor.
    • There may be a leaky faucet or pipe under the sink.
    • A refrigerator or freezer may be not be working properly and leaking fluids slowly where the homeowner cannot see it.
    • In locations that receive a lot of rain, rain run off may not be properly diverted away from the exterior of the home allowing moisture to seep in underneath the home and therefore potentially into subflooring.
    • Slow leaks could exist in roofing or in overhead sprinkler systems. 

Solutions:

Install a humidifier or dehumidifier in your home to help keep the humidity at constant levels. Be diligent about hardwood flooring installation preparation and make sure your home remains at a constant humidity level while the wood is being acclimated in your home before installation. Dryers can help speed up drying spots in the floor if need be. Once relatively constant humidity levels have been achieved in the home, have your flooring moisture tested to determine if any further action is necessary. Depending on the age or condition of the hardwood floor, the planks may need to be resanded and or recoated.

What is a tongue and groove?

Tongue and groove

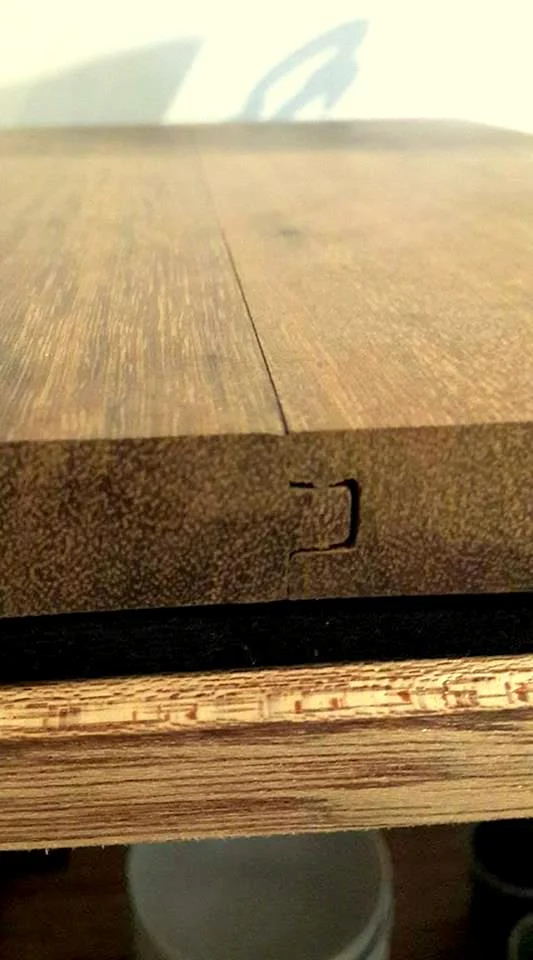
Tongue and groove is a method of fitting similar objects together, edge to edge, used mainly with wood, in flooring, parquetry, panelling, and similar constructions. Tongue and groove joints allow two flat pieces to be joined strongly together to make a single flat surface.

A strong joint, the tongue and groove joint is widely used for re-entrant angles. The effect of wood shrinkage is concealed when the joint is beaded or otherwise moulded.

Each piece has a slot (the groove) cut all along one edge, and a thin, deep ridge (the tongue) on the opposite edge. The tongue projects a little less than the depth of the groove. Two or more pieces thus fit together closely. The joint is not normally glued, as shrinkage would then pull the tongue off.

In another assembly method, the pieces are end-matched. This method eliminates the need for mitre joints in furnitures and face nailing on floors.

For many uses, tongue and groove boards have been rendered obsolete by the introduction of plywood and later composite wood boards, but the method is still used in higher-quality boards. Plywood may also be tongued all round to fit it flush into a framed structure, and plywood for sub-floors used in platform framing is often supplied with tongue and groove edges.

When joining thicker materials, several tongue and groove joints may be used one above the other.

One of the following woodworking tools may be used to produce the tongue and groove:

  • A four- or six-head moulder (for large quantities)
  • A wood shaper (spindle moulder)
  • A circular saw bench
  • Suitable hand planes: a plough plane for the groove and a tongue plane for the tongue, or a combination plane
  • A spindle router

Don’t mistake it with tongue-in-groove !


Source Wikipedia.


Your floor and its reactions to greenhouse effect.

I have a vacation home and when we left our floors were fine. Now they are weird shapes and or are making noise when we walk across it. Why is this happening?

greenhouse and wood floor

This is known as the “greenhouse effect”. Your hardwood flooring will still react to moisture and humidity changes within the home even if you are not there for extended periods of time. Most of the time, a house has been closed off, its central air units and other humidity control devices, if any, have also been shut off during your absence. This causes the heat that is trapped by the house during the day to stay in the house. When the house cools at night, condensation will form in various places of the home and over time this constant “up and down” effect wreaks havoc on your hardwood flooring. Once you’ve entered the home and caused constant humidity levels to re-balance in the home, you’ll need to take measures on repairing cupping, crowning or even buckling if it has occurred.

When you leave the home again, leave some of the windows a bit open to allow for proper ventilation of the home. Use window blocking bars, sticks in the window sills or other security devices to prevent the windows from opening fully in your absence.


Text extract from woodmonsters.com

Minimizing Moisture from Subflooring

Subfloor moisture and poor installation

Subfloor moisture and poor installation

The key to minimizing moisture from your subflooring is to make sure to use the appropriate vapor barrier in conjunction with understanding the specific moisture issues your subflooring may display.

All types of subflooring should have some sort of vapor retarder barrier installed to block moisture from seeping up from the subflooring into your new hardwood flooring. A vapor retarder is any barrier that is used in the construction industry to prevent or block moisture from seeping from one section of a house to another. For example, vapor retarders can be made of foil, large sections of plastic sheeting with different thicknesses, felt paper or sheets of vinyl. Vapor retarders can be used when installing siding or roofing as well.

Subflooring is made from various types of materials including wood, vinyl, concrete or other materials. Each of these types of materials presents its own moisture control issues that need to be addressed and understood before hardwood flooring is installed.

Your professional hardwood floor installer will be able to check your subflooring for moisture levels prior to installation. To have the best chance of having the moisture levels between your subflooring and your hardwood flooring to be within their proper ranges, make sure humidity control units are in place in your home and running adequately at least five days prior to the hardwood floor being delivered to your home. Your installer can then determine which vapor barrier will provide the proper protection your hardwood floor will need.

Wood subflooring will always expand and contract with moisture changes just like hardwood flooring will. Concrete flooring also will continually “breathe” because it’s a porous material. Moisture on concrete can be seen in the form of vapor when weather conditions are prime or even condensation in places. Which vapor barrier gets installed will be determined by the type of subflooring you have and what types of moisture levels you’re operating at. Your subflooring should be securely intact and level prior to installation.

During installation, installers should be careful to not penetrate a vapor barrier once it has been installed. For example, if a vapor barrier is laid on top of a subflooring but a solid wood floor nailed down on top of it in which the nail penetrates the actual vapor barrier, then the barrier now has a small hole in it. Moisture can slowly seep through the edge between the nail and the vapor barrier. 


Source: http://www.woodmonster.com

Problems: Cracking or Gapping

wood flooring cracks

Small cracking within and between hardwood flooring planks are normal and should be expected during certain seasons and will vary depending up specific geographical locations. When the air is dryer, wood flooring will release some of its moisture into the atmosphere and naturally shrink. Cracking or gapping between the planks will appear and may be slight or somewhat noticeable.

When the outside air is filled with more moisture, such as in spring, the boards will absorb some of the moisture and swell back to their original size. This is normal for all hardwood flooring and will happen as long as the wood floor is installed. Engineered hardwoods will display less of these characteristics.

Woods that are naturally darker or carry a darker stain will help cover up some of these cracks. Further, purchasing hardwood flooring that has added texturing such as hand scraping, chiseling or brushing also will help to blend the cracks and spacing.

If a homeowner does not want cracking or gapping to occur, humidity control devices should be placed within the home to achieve nearly constant humidity levels. If putting a humidifier or dehumidifier in the home is not an option, homeowners can increase the humidity levels during drier months by not turning on the bathroom fan when showering, opening up a dishwasher when the final rinsing is finished or hang clothing to dry indoors. A large pot of water can be placed on a conventional stove top on one of its lowest settings as long as it is carefully monitored for safety purposes. Homeowners may find placing a cast iron pan full of water on top of a level heated wood stove may also serve the same purpose. 


Source: http://woodmonsters.com

Finishing, what is Tung Oil?

tung seed

Tung oil is a drying oil obtained by pressing the seed from the nut of the tung tree (Vernicia fordii). Tung oil hardens upon exposure to air, and the resulting coating is transparent and deep almost wet-look. Used mostly for finishing/protecting wood, after numerous coats the finish can even look plastic like. The oil and its use are believed to have originated in ancient China and appear in the writings of Confucius from about 400 B.C. Raw tung oil tends to dry to a fine wrinkled finish; the US name for this is gas checking: this property was used to make wrinkle finishes, usually by adding excess cobalt drier. To stop this, the oil is heated to gas-proof it, and most oils used for coating are gas-proofed. Thus, to avoid the wrinkling, all tung oil available for finishing today is "boiled".

Wood finishing

Tung oil is very popular today because of 2 properties: First it is natural or "green" product when it has dried. Secondly, after it cures (5 to 30 days, weather/temperature related), the result is a very hard and easily repaired finish. This is why it is used on boat decks and now on floors. The oil is often diluted with hydrocarbon thinner so that the viscosity is very low and enables the oil to penetrate the finest grain woods. This thinning vehicle evaporates within 15 to 20 minutes and results in a totally green residual finish. As mentioned above, when applied in many fine/thinner coats over wood, tung oil slowly cures to a satin "wetted wood" look with slight golden tint. Tung oil resists liquid water better than any other pure oil finish and does not darken noticeably with age and is claimed to be less susceptible to mould than linseed oil. Most importantly, of all the oil finishes, tung oil is the only drying oil that will polymerize 100% (completely harden). Linseed oil, for example, never completely hardens.

While tung oil has become popular as an environmentally friendly wood finish, it should be noted that many products labelled as "tung oil finishes" are deceptively labelled: polymerized oils, wiping varnishes, and oil/varnish blends have all been known to be sold as tung oil finishes (sometimes containing no tung oil at all), and all the above contain solvents and/or chemical driers. Product packaging will usually clearly state if it is pure tung oil.

Source wikipedia